a long day in four sessions
Session One
Last week (or maybe a little longer ago) I found four ceramic heads that I made a long, long time ago. I wanted to use them in new projects. Last week (or maybe slightly longer ago) I started to think of ways to use this bisque fired beast head. I pulled out a pair of wooden paint stirs and three sizes of old prescription bottles.
But they weren't quite right.
Today I was eager to try to find a way to use the head and a bottle. I got out a sketchbook...once I started drawing I had some ideas I liked.
 |
| I had been planning on using the bottle with the open end down and putting the paint stir/paintbrush legs up into the empty space and fill it in with plaster cloth to secure them |
 |
| then it dawned on me to use the cap for the bottle and drill holes into it and then attach the assembly to the bottle body |
 |
| an example of what an eye might look like once placed in the socket |
 |
| I found a cap -- not sure if it is the exact one, but it will work |
 |
| so now I needed to affix the head to the new paint stir shoulders to prep for plaster cloth |
Session Two
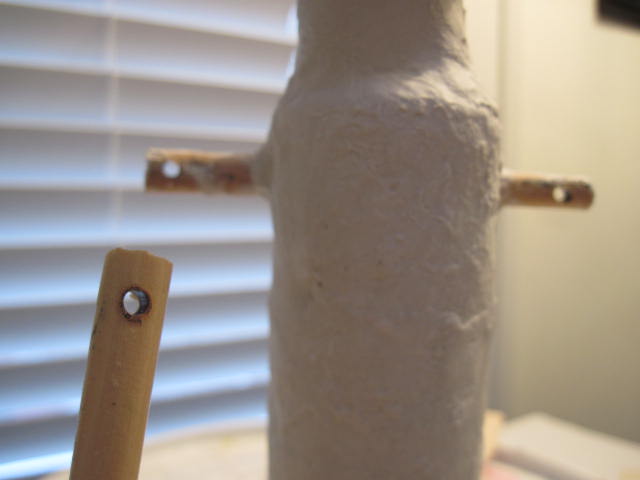
After a break (and some time to think about the project) I decided it would be better to drill holes in the bottle body for "shoulders" because I was out of love with the sawed off paint stir...for this guy anyway. And while I was working, more ideas started to come...
 |
| At this point I decided I didn't like how the head was looking like a skull so I added plaster cloth to it to reshape it. |
 |
| It is hard to tell from these photos, but it really does look better with the plaster cloth vs the "skull" look. |
 |
| I found the part that was really throwing it off and added more plaster cloth to make the head more symmetrical. |
 |
| I dropped the plastic ball beads back in to fill up the sockets -- for now |
Session Three
I was eager to cut up the paintbrushes for legs -- I decided to sort of joint them -- then I was obsessed with drilling holes through them so I could add some sort of jump rings as connectors. I started out by trying the big (real) drill but it was too unwieldy for such small surfaces. I dragged out the Dremel tool but it scares me sometimes with how fast it goes...and it gets hot and starts to burn the wood...then I start to become less confident...then that turns into being actually afraid of using it because accidents start to happen. Like the drill goes all the way through the wood and before I can turn the Dremel tool off it sort of takes off and spins the piece I drilled through at a billion miles an hour while I am trying to quickly turn the tool off but I don't want to get hit with the spinning piece. Gah. So then I gave in and brought the Dremel drill press into the plaster cloth studio -- it made everything much better.
 |
| I think it might be time to get a new blade for the saw. |
 |
| I should have just brought out the Dremel drill press in the first place. |
 |
| the difference -- on the right shows what happens when I start to get scared of the drill and it spins with the piece attached to it |
 |
| the paintbrush section where I started using the drill press |
 |
| wow -- look how close to the edge I got without the wood splitting or taking off |
 |
| yes...MUCH better with the drill press |
 |
| the drilled paintbrushes for legs |
 |
| playing around with cutting wire "jump rings" to test out ways to attach the arms |
Session Four
I took another break and I was thinking about how to attach the leg sections to the bottle lid. I knew the legs wouldn't be very weighty so I wasn't terribly concerned with just popping this lid on -- I don't think it is the right one -- I couldn't twist it on. It seems to be fine. Then I realized (another "duh!" moment) that this guy would need to hang to dry. I used white wire coat hangers to hook through the drilled holes in the "shoulders" and supported them with a regular hanger and hung this guy in the guest bathroom to dry...this is enough for tonight!


No comments:
Post a Comment