Showing posts with label plaster cloth guys. Show all posts

Friday, February 15, 2013

365/2013 - Day 45 (one day late)

almost caught up on posting blog entries

Here is the blog entry I should have posted for yesterday (Thursday, February 14).

I ran errands like crazy in the morning with my sister, Sue.  Then I got back here with just enough time to bring the last of the plaster cloth guys to the final ready-to-paint stage.  A few needed an entire coat of gesso and a couple needed touch ups after that final coat.  NOW they are all ready to be painted!  (And one of them will be getting some glow-in-the-dark paint!)


Today was the 2nd Thursday of the month -- time for our Second Thursday get together!  It has been quite a while since we actually had a meeting and it was a GREAT time!  We had eight participants tonight -- and Juana has joined our group!

We worked on painting with acrylic paints (Juana used Berol Prismacolor Pencils) and we painted inside of paper mache boxes and box lids, bringing the images up onto the inner edges.  We had such a wonderful time -- I love this group so much.
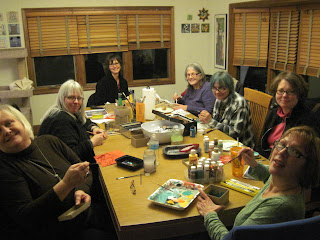
Clockwise, from lower left:  Ruth, Juana, (me), Joan, Janice, Leann, Deb, Peggy
Joan
Janice
Leann
Deb
Peggy
Ruth
Juana
Took

Monday, February 20, 2012

2012/365 - Day 51 -- part two

working on atomic fireball happy hour guy

Named for the two major components of his inner structure, this guy is cracking me up. He keeps changing so much. I put on ears, I take off ears, I try new ears, I rip new ears off...I round off the top of his head, I add layers to his face...I'm done for today.

I couldn't always stop to take a picture, but here are a bunch from this session. He is not any specific creature/animal. (side note: it has been quite a challenge to work around those antlers without getting poked in the eye!)


These ears were made by cutting off the ends of really long and thick paint stirs. I taped them together so they'd be the same length then I cut them with the saw. Oddly enough they fit like jigsaw puzzle pieces at the points where they are attached. They may or may not stay the shape they are right now.

That was all I was going to do to him tonight. Yeah, right.


I wanted to get rid of the severe drop from his forehead to his nose. I layered on some paper rags...this time they were dry.


Then I found they work much better when I dip them in the warm water first.


I kept layering more paper rags and then a layer of smoothing plaster cloth...


...adding more across his nose, then in big triangle shapes down his nose.


I dunno...I am learning as I go, so I am not going to complain about how he is turning out. He is nowhere near being done so there is plenty of time to figure him out.


I know he will never be a version of a real life animal, that's for sure.


Stepping away for tonight.


The view from my desk.


Ha...from this angle it looks like the dream beast is either whispering to the crocodile guy or they have merged into one creature.

Wednesday, February 1, 2012

2012/365 - Day 32

four small projects, one blog post

Although I have been reunited with some of my television shows, I still don't have a dvr back yet (arrives tomorrow -- fingers crossed) and that means if I am to watch anything, I have to watch it in real time...how quickly I became used to recording everything and fast forwarding through commercials and saving shows for later, more convenient times. I totally forgot what it was like to not be able to back up or pause something I am watching.

SO -- I wanted to work on a few smaller projects and blog about it so I can be done for today and settle in front of tv for the evening.

1. addressing the legs on the wolf-ish guy wrapped in a towel


I needed to decide what to do with this guy's legs...I kind of wanted to leave them as they are -- wood and old debris -- but the old debris is really sharp.


I also need to fill in the gaps between the body and the legs.


This is the sharp stuff...I took the wolf-ish guy downstairs and tried to sand the old debris but it is really thick and old and just a tad scary...best to cover it up.


I started to lay the plaster cloth down, trying to be careful on the inside of the leg so that it didn't get too thick to work with.


Then it hit me -- duh!...


...these legs screw right off!

I could make them smooth and thin on the inside sections because now I could easily reach everything.


a leg, setting up enough to move it


When the legs were dry enough to touch I screwed the one back on and set the wolf-ish guy on my desk to dry.


2. further de-creep-i-fyin' the canid

Okay...this guy is somewhat less "Mr. Creeping Me Out" than he used to be, but he still needed work.


Part of the problem is that now that I have built up parts of his face his eyes are too sunken and small.


Ta-daaaa...plaster cloth eyes.


Again...he still needs quite a bit more work. I am not sure he will remain some sort of canid...we will have to see how things turn out.


3. giving the dream beast eyes

Oh. My. Gosh. I cannot believe how adorable this guy is!


AND he is very, very flirty!


I love his eyes.


He still needs ears...and maybe a tail.


I hope I don't wreck him!


4. revisiting an old "save it for later" project from last year

When I was making Chime Cat for the "Come Play With Me" show at Paint Creek Center for the Arts last year this guy was also under consideration...but Chime Cat took waaaaay longer than I anticipated.


This guy's base is one of those Fisher Price roly poly chime balls.

I set it aside for later back then because I couldn't figure out the balance of it.


Not that I can now, but I am more willing to work on it now.


I love the sounds this ball makes...very ethereal.


I originally bought the ball for my niece when she was very young, probably in 1981 (or so). Now I have it again.

Saturday, January 28, 2012

2012/365 - Day 28

my collaborators arrived unannounced!

I came into the studio in need of something to work on and blog about. (I was reunited with television this afternoon and it was like I had never seen it before...sheesh.)

The body of this cat-ish creature only had a single layer of plaster cloth on it so I could still do pretty much anything to it. I could still build it up and shape it.


I knew I wanted to get rid of the sloping part of the plaque base that looked sort of like shoulders. I took some photos and tried to draw on them but it just wasn't working this time. I had to just try stuff on the creature.


What was handy...those rags/paper towels. I kept folding more and more of the squares together until they were thick enough to even out the back. I cut them to fit the back of the creature.


I masking taped the area.


I plaster cloth'd the area and built up the base of the neck a bit...but what else?


I rinsed off my hands in the plaster cloth water container and used a fresh paper rag to dry them...eureka! My guides/collaborators arrived without warning!


Suddenly I was flattening out the slightly elongated square of paper rag. Then I started to roll it up diagonally and then I folded it in half.


I took a strip of plaster cloth (I had ONE strip leftover that wasn't cut into a triangle shape...how odd) and got it wet, laid it on the table and rolled the semi wet paper rag into it. Then I got my hands really wet and smoothed out the plaster cloth. I put another larger piece of plaster cloth on in the same manner (it was a triangle, though) and took the hint to dip it into the plaster cloth water really quickly and then I kept smoothing and pulling...like pulling a handle out of clay.


I tapped the bottom flat.


I positioned it on the back of the creature's back and started to anchor it with plaster cloth.


Then it "occurred" to me to curve it a little -- man -- it was just the right length!

I had to keep alternating between laying on anchoring plaster cloth triangles at the base and tiny plaster cloth strips around the curve. Then I added more triangles to the back to smooth out the lumps.

Wow -- that happened SO fast...I had to take the photos really quickly so that I would be able to see how it went together. (My poor camera is a plaster cloth mess.)


Oh. My. Gosh. I am in love with this guy!


I just want to pick him up and cuddle him.


And now he is taking his place among the other guys on the drying rack again.
Related Posts Plugin for WordPress, Blogger...