Showing posts with label hand carved rubber stamps. Show all posts

Monday, January 7, 2013

365/2013 - Day 7

prep work

Today I prepped the stray 17 Tookies that I had to remake when I started this batch and I also printed out a lot of hand made rubber stamp images.


The 17 Tookies that needed the side, top and bottom seams.

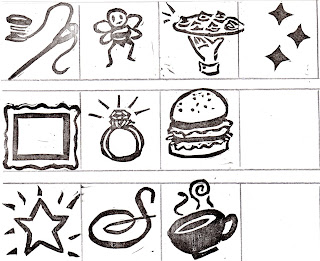
I stamped out a whole bunch of images with hand cut eraser carvings/rubber stamps...this is just a small sampling.


I cut out all of the images and sorted them into envelopes for easy retrieval.


I traced the outline of the oversized playing cards that will be my working area for the designs.  After I assemble the designs I will reduce them to the proper artist trading card size.

This process took all evening -- I wasn't counting on it taking as long as it did.  I will assemble the cards tomorrow.

Sunday, June 17, 2012

2012/365 - Day 169

slow progress is still progress

I am most of the way through yesterday's projects.  I still need to get wood mounts for the carved rubber stamps.  At the time of this writing I am at 43 out of 100 MDF blocks.


 Those edges take time to do!  But if I go downstairs to the basement and turn on some music and do 10 - 15 pieces in each session I should be done tonight.

I have to keep wiping my fingers from the paint getting on my holding/turning the block hand.  I am so trying not to smudge or smear these blocks!  Painting -- gah!


And back at work on the carving of the images for the Art Hunt.


I am pretty happy with the way they are turning out.


Except, that is, for the image I wanted to use for my hidden art with the Art-o-mat machine in the store at the Northville Art House.

I am really not very strong with carving lettering -- no matter what size it is...and these letters are teensy.  I was just not happy with this carving, even though it is only going to be used during the game -- the lettering really bugged me.

After trying it three different times I had had enough and I decided to go instead with the three diamonds that Clark uses sometimes...middle row on the left edge.


These are the completed carved rubber stamps!


And this is how they might look if they were stamped on an art hunter's playing card.

(And if they were in alphabetical order...LOL)

I got ink in three colors, plus black for my stamp.  The cards will look much different on the day of the hunt.


Okay...now for a little rest and a bit of lunch.  After that I have a ton of housework to keep plodding away at.  And laundry.  And I need to finish the MDF block edges.

Saturday, June 16, 2012

2012/365 - Day 168

the two things I'm working on today/tonight

This is going to be a very hectic week coming up.  I am trying to organize my time as efficiently as possible...but that trick never works, does it?  I've made several lists and I am trying to follow them.  I like lists.

Today I am working on two specific projects.  Carving the rubber stamps for the Art Hunt and painting the edges of my MDF blocks for the DIY version of Penciled In for Art-o-mat.  


I got the idea to use the brayer to roll the paint onto the edges of the MDF block.
(I knew I had a smaller, narrower brayer!)
The edges of the blocks are pretty rough and really tear up brushes...plus I really like the way this looks for the DIY version.  I may put a second coat of paint on in different colors, but then again probably not because I think the paint will mostly go where it already is.

William Hessian is coming to stay at my house while he is here for the Miniature Art Hunt and we will be working on the collaborative version of Penciled In.  He has completed most of his coloring of my characters but I think he may have a few more to go.  Those blocks will need painted edges and they will need all of the labels and information inserts printed and cut and applied to the boxes, etc.  I can do the finishing up parts after William has left, though.  I am anxious to see the series in person -- the sneak peek photos I've seen were really great.


Today/tonight I am also working on carving the stamps for the businesses to use during the Art Hunt.  This year it is more like a scavenger hunt version.  The participants will have a blank card with the names and addresses of the businesses where the art is hidden and on the reverse side the business will stamp their image to show the hunter has located the art in their venue.
When I took this photo I had only completed one carving so far.  I found mostly clip art images to represent the participating businesses.

I bought all the stamp pads today...it was pretty cool -- ALL stamp pads at Michaels were 40% off today.

I think I will be mounting these on some sort of block or maybe a dowel type handle so the stamps are easier to use.


Okay -- back to work!  (And in between times I am also working on cleaning the house -- in very short bursts.)

Friday, June 15, 2012

2012/365 - Day 167

carving, take two...and visiting with Peggy at her solo show

Well, it's take two for the carvings...the other size was just too small. I have carved smaller stamps before, but I want people to be able to actually see the what they've stamped when they use them in the Art Hunt.


Cutting more carving block material to a more workable size.


Yes...there is quite a size difference!


Oh...this is how it happens...how my desk gets cluttered up overnight.

As soon as I get these figured out I will be able to put the extra stuff away.


Practicing the designs on the smaller already cut pieces of carving material.  I haven't used this particular material before and I wanted to test it out before I started hacking at it for real.

It is unbelievably smooooooooth!


This evening Ruth and I went to the Village Theater in Canton, MI to see our friend Peggy Kerwan's solo show.  Peggy has forty (gasp!) paintings on display -- it is a delightful and very colorful show that is very, very Peggy!


When we walked in Peggy was right near the front of the gallery working on yet another piece!


Here is the lovely Peggy Kerwan with some of her work.
 Tranquili-Tea
"The river of life winds through shadows from the sun setting behind silhouetted mountains; the tree line reflecting bits of the day's last rays of light."

9ft x 4ft triptych made from 
456 Tazo tea bags - wrappers
Exhibited at Art Prize 2010 in
Grand Rapids, MI

$2500


This one of my favorite of Peggy's works.


Peggy and Ruth talking about Peggy's work.


Another of my favorite pieces --

Rudebeckia
18x24 paint - hand painted paper
(model:  Becca)

$350

Ruth and Peggy...gettin' specific.


Okay -- if I could purchase just one of Peggy's pieces this is what I would choose.

Myth of the Eclipse
18x30 paint & hand-painted papers
African belief that an eclipse happens 
when a crocodile eats the sun

$700


And if I could purchase another one...

A Cat I Could Hug
(non-allergenic)
11x14 paint - paint chips

$95


And okay...one more...(well, I would also want Tranquili-Tea, so this is the fourth piece I would purchase).  (Oops...and Rudebeckia, too...so that's five.)

Fireflies
14x11 paint - hand-painted papers

$95


If you get a chance to make it out to Canton, do yourself a favor and go see Peggy's exhibit -- it is just wonderful!  It runs through June 26.

Village Theater at Cherry Hill
50400 Cherry Hill Rd.
Canton, MI 48187

Ph: 734/394-5300
or 734/394-5460

Thursday, June 14, 2012

2012/365 - Day 166 (updated)

carving images for stamps

The incredibly multi-talented artist William Hessian will be coming to Northville next week during the Arts and Acts Festival to put on the 2nd Annual Northville Miniature Art Hunt.  This year's hunt will be more like a scavenger hunt with William's tiny artwork hidden in plain sight in 10 businesses located in downtown Northville.

One of the things I am doing for the hunt is carving the images that will represent the businesses on rubber stamps.  When an art hunter finds the hidden art the venue will stamp the hunter's playing card indicating that they found the art in that business.


I cut a bunch of 1" square pieces of carving block to work on.

This will be fun!


This is a make up post.  I am actually making this entry on Friday morning (June 15) instead of last night when it would normally have been posted (Thursday, June 14).  I was very under the weather on Thursday night.

Monday, August 29, 2011

365 Day 241

I'm falling in love with this project

YAY! This is the sort of thing I was hoping for -- that I could let go of the idea of "landscape with a capital L" and just make a "places" inside of a deep shadow box...and submit them to the show and not be concerned at all if/when they don't get juried in because I love them so much that I will be hanging them on my walls in my house anyway. And I am only partway there!


Okay. Remember this is how the uncarved linoleum block looked the last time I messed with it. And remember I said it was no big deal because I could still carve on it?


I have been playing with the idea of either a pretty piece of handmade paper (or layers of colors of paper) or a watercolor-washed sheet of watercolor paper as the background for the shadow box scene.


Today I figured out that -- duh -- wouldn't it be good if I tried to carve one?


I traced a circle onto the block.


I started carving it out with different sizes of blades. That was going to be a LOT of carved out area, so I wanted to vary the carving marks.


I have never carved in this way before. I didn't make an outline circle, I just started each gouge at the line and carved away from it, trying to keep the edge even.

My original idea (and I'm not positive I won't still do this) was to carve vertically for the sky and then carve the sun/moon horizontally or diagonally with really thin lines.


While I was carving I thought I would try to leave some surfaces that might look like tree trunks. I did it without lines. I was thinking I might cut really thin lines or patterns into the trees...that is still undecided, too.


Here is the first test print on just plain newsprint. I used my Speedball Red Baron baren instead of a plastic spoon for burnishing because the bottom of the carving is so flat and the top is so open.

Not bad for a first try.


Second test print. There are a lot of ideas floating around in my head about how to proceed with the carving of this block, but I kind of like it like this and I need to look at it for a bit longer.

I was planning on making each of the mostly vertical sections of the hill have individual diagonal lines...maybe make some rock-like gouges every once in a while. We'll see...


In the meantime I got the idea to stamp out a bunch of the images and play with how they could look together.

I needed a lot of trees. These are the bigger ones.


I love repetition!


Yep, yep, yep. I am really loving these individual stamps. I have about a billion ideas of how to use them right about now...and ideas for more images for the set.


These are the smaller trees.


repetition, repetition, rep-e-TITION! sung to the tune of "Levitation" by Hawkwind.


The stamped and cut out landscape elements along with the test print background.


This is cracking me up -- I love it!

This would be dimensional in the deep shadow box. Pretend like you can see behind things.

I just laid these out to see how it might look.

The stripey hills with the sitting rabbit.


The plain hills with the squirrel.


The running rabbit and both hills.

In this scene that large cloud almost looks like the top of a tree over those three trunks. That gave me another idea for more carvings!


Wow -- like I said, I am really falling in love with this whole project! The possibilities are pretty much endless. It's funny. I started out making art by rubber stamping back in the late eighties. I even had my own mail order rubber stamp business. I still have the vulcanizer. Hmmmm...

But for now, maybe I can make loads of variations of these little shadow boxes and put them in my Etsy store...if I get that ambitious!

Monday, August 22, 2011

365 Day 234

I may have found a way to do a landscape I will be happy with

Okay...I am still thinking of how I can make something to submit to the landscape themed show and I think I may have come up with something that will work.


I already had some of these very plain and simple deep shadow box frames.


And I am still in the mood to carve and/or make relief prints...but so far I haven't been able to come up with a composition that I like. Whether I use the photographs I took as a reference or whether I make it up in my head, I just haven't come up with anything that is visually interesting to me.

I'm just not
feeling it yet.


This is the very very very basic idea of what appeals to me right now.

Two hills with trees, clouds, maybe a moon or sun and probably a house in between the hills.


And then today it hit me...how about using the deep shadow box frames and make a dimensional scene and forget about calling it a landscape (to myself)...I think calling it a "landscape" is what has been throwing me off.

I can carve some of the elements, print them out, put them onto cardstock and vary the depths of them in the shadow box frame. I can construct a little "place" inside of the box frame and then if I like it enough I can submit it -- if not, then I will have some more art that I have made that I really like and will hang for myself in my house.


Okay...these are still messy and just the first trial carvings and attempts at using the stamps together. They aren't inked well or very cleanly masked, but you can get the idea.

I am pretty excited about this now!


And in the end, I will have a bunch of hand carved stamps that I can use over and over again!

Oh...and by the way...I have been meaning to do an Art-o-mat series of small hand carved stamps for some time now. This is putting me back in thinking mode for that, too! I have way too many ideas for series for Art-o-mat...I will never be able to do them all...LOL...but hopefully I can do this one!
Related Posts Plugin for WordPress, Blogger...