Showing posts with label carving materials. Show all posts

Wednesday, March 14, 2012

2012/365 - Day 74

printing with and carving (new to me) materials, plus trading ATCs


Tonight at the ATC Exchange group Leann showed us a couple of methods of printing.

I knew about carving, but I had never carved an eraser like this or used this type of vinyl. Both were smoooooooth like buttah!

She also showed us about making impressions in a foam material that is similar to what packaged meat at the grocery store comes on...but thinner. It was way cool and held the impressions I made with a stylus remarkably well.


Very fun meeting.

These are the marvelous artist trading cards I got in exchange for the ones I made. The theme this month was "circles".


Most of us have traded our tarot themed cards but I will wait until next month for the last couple to show my complete set. They are great so far!
Friday, August 26, 2011

365 Day 238

quite cloudy in here tonight

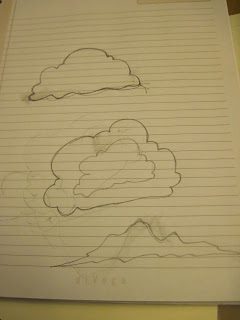
Another night of free hand drawing clouds and carving them for my deep shadow box "landscape"/places/scenes.


I was looking at clouds while I was driving today. These are sort of similar to what I saw.


To get a smaller version of one, I drew the outline inside of the larger one.


Let's get carving! (Twink is already in the bedroom.)


Tonight's cloud number one.


Cloud number two -- same cloud, reversed.

This is a different carving material for me, this pink stuff. It gives you a LOT more resistance when you are carving it, but it is soft and takes ink pad ink really well. I don't know how it will print with the brayer and nice paper and block printing ink.

These are all just quick test prints with an old ink pad. I really like it...I need to get some fresh ones to play with.


Clouds one and two, together.


Cloud number three.

This was a bear to carve because I had to push hard but be careful not to stab myself when the inside was getting cleared out.


Cloud number four.


Cloud number five.


A messed up test print of cloud number five -- but I really really like it. I wonder if I can do it again. It slipped or the paper moved or something.


The entire "landscape" set (so far).


Monday, July 25, 2011

365 Day 206

awww...our last session of relief printmaking

Tonight was our last session in the eight-week course of relief printmaking taught by Shaqe Kalaj at Art & Ideas Gallery in Plymouth, MI. Wow...the time really passed quickly!

Tonight we completed our 2-color ink printing process. Last week we printed the first color and then took our blocks home to carve out the other areas during the week. Tonight we learned to register the blocks and then print with black over the base color.


Shaqe started with Carla's print. (I missed shooting Shaqe showing us how to line the block up.)


Shaqe is re-inking a spot here.


Now Shaqe and Carla are looking at the print that Shaqe just pulled.


Next comes the demo with my prints. I used red as my color and that ink was a lot more watery than the blue. It was a teensy bit frustrating to work with last week and my prints show it...LOL. But this is a learning exercise and I DID learn a lot from all the steps!


Getting ready for Shaqe to come and print one of mine.


Shaqe inking up my Blick Golden-cut block.


In the meantime, Carla has pulled a great print!


Shaqe getting ready to line up the inked block on the first print.


Shaqe registering the block on the print.


Shaqe burnishing the paper with a plastic spoon.


Close up...you can see the red ink through the paper but you can also see the black coming through where Shaqe has rubbed it with the spoon.


Checking to see how it looks...does it need more ink?


Yep, it needed more ink!


RE-inking.


Shaqe pulls the completed print off the block.


Not too bad (considering how icky the print looked to begin with)!


The block after I washed it off.


Carla and Shaqe looking over Carla's prints.


ALL of Carla's prints...pretty successful, I'd say!


Shaqe looking over my prints.


Shaqe agreeing that was the most successful of mine.


LOL -- my least successful...I hit the paper with the inky brayer when I was re-inking...I knew I did it so I didn't bother with trying to fix the ink around the edges...other than that it actually lined up pretty well.


My most successful 2-color ink print.


I really enjoyed this relief printmaking class. We got a great overview of many kinds of printmaking processes. We tried out 3 types of carving materials, we got a chance to try out hand tools and electric tools on two types of wood, we pulled a print that was included in the all ages student show at the gallery, we learned a method for 2-color printing...and we got individual attention, coaching and suggestions throughout the eight weeks. Oh, we also did some critiquing and got some help with artist statements and writing about our work.

I know I definitely want to take more classes from Shaqe at Art & Ideas -- she is a really great teacher. I learned a lot about printmaking and carving and also about drawing and thinking about things in new ways.

Monday, June 27, 2011

365 Day 178

another material in printmaking class

Tonight in relief printmaking class at Art & Ideas, Shaqe gave us a new material to try. It is called Blick Wonder-cut. She also had us choose another of our sketch book drawings.

I went in all excited about that super hero drawing from a few days ago. Shaqe liked it but guided me back farther into my sketch book. Good thing she did, too.

We found this page. I was looking at the page as three or four separate characters/drawings. Shaqe helped me see that the three figures could work together as a piece. They also are closer to the earlier carvings I have done in class. This will all get pulled together later as we put our series together. Hmmm...sounds cool.

So this Wonder-cut stuff...I am not terribly fond of it. It has a surface texture to it to begin with. It also smells a little like cork...and acts a little like cork. It is a little bit spongy to cut. You put your blade into it and when you pull it back the material kind of closes up a bit. Hard to describe. Also, my outline lines are waaaaay wider than with the other materials. Both the softer E-Z-cut and the harder Blick Golden-cut tend to give you the line that you carve. This Wonder-cut material is very different.

I am very glad to have the opportunity to try out so many different carving materials. I know now that I like the Soft-cut gray for some things and I like the Golden-cut for others. I know you have to be more careful with the storing of the Soft-cut because the surface can get scratched and marred. The Golden-cut gives you a more hard surface for your block. The Wonder-cut is probably good for something that I haven't figured out yet. This class is really great!

Also tonight -- I delivered my completed bear-ish guy print, matted and framed, for the upcoming all ages student show. I am very excited about this show. The age range of the artists is 5-70 years -- how cool is that! You will have to wait to see the photos from the show...opening is July 9. I will post more about it as the date gets closer...and plenty of photos from the show.


we traced a detail from a drawing in our sketch book


then we played with variations of it


then we chose the one we liked and transferred the image to the Golden-cut block...you can sort of see the surface texture in this photo...kinda sorta tiny like bumps, sort of grainy but not...the material doesn't really crumble or anything


I have carved the outlines in this photo and taken out a little bit for white areas...you can see how much wider my outlines are...the material doesn't really want to be cut a whole lot closer...it is cork-like and soft-ish...you put your blade in and when you pull it out the line expands (or something)...hard to describe

it's not a bad thing, I just don't care too much for it in comparison to the other materials


a test print of the carving...this is actually the second print after I tweaked the first version...I'm not done with this yet and perhaps I will get used to inking the surface...I know I want to give it a background of some sort...I had an idea on the way home
Related Posts Plugin for WordPress, Blogger...