Showing posts with label collage. Show all posts

Monday, May 26, 2014

Day 146 - 365/2014

Day One Hundred Forty-Six

Wow...this has been a very long time in the making (completing).  I think this guy is finally done.  A link to his past is here.

Photos from working on this collage from today:


First I darkened his outlines.
Next I got out the coloring materials...watercolor pencils, transparent watercolors, wax crayons, and blending chalks.
I started by coloring the shirt with a light blue watercolor pencil, then I used water and smoothed out the color...the left side shows the water smoothed color.
I added white to his sleeves with blending chalk.
And here he is so far.
I added pink blending chalk around the polka dots on his shirt to make them different from the other dots in the collage.
Next I started to add yellow blending chalk to the neck/face/ears.
I used Prismacolor pencil to add white to his eyes.
All done...I sprayed the canvas with Krylon low-odor matte spray and it didn't dull out the colors too badly.  I am happy with him!
Now comes the hard part for me...naming him/titling him.  I thought I had a frame that came with him but I can't seem to find one...oh well.  I also need to get him a frame.

Sunday, May 11, 2014

Day 131 - 365/2014

Day One Hundred Thirty-One

Yikes!  I checked the time and it was already 11:30 -- no time for a second try with the plaster cloth project!  Must. post. entry. before. midnight.

Okay -- I fixed the chronology of the photos...it is really 12:02 now.  

Today I did a lot of thinking, prepping, layouts, etc.  I worked on three projects and have a few things to show for it.  Here is how it went...

I want to make a few more postcards for the Paint Creek postcards sale/show.  I remembered this eraser carving I really like that I already had printed on nice handmade art paper.  I sprayed it with varnish to make sure the glue wouldn't make the ink run...that was then set aside to dry.
I hacked away at the head of this alligator toy.  I took off all of the alterations I put on it a long time ago (and was never very happy with) and started over...that is what prompted just cutting the old head off all together.  THAT was a long process and I had to keep coming back to it and turning it and sawing more, etc.  I finally broke through and it came off.  I was kinda "done" at that point.
Then I went back to thinking about another possible postcard.  I knew I wanted to do an Animal People assembled cat girl that was too large for the Art-o-mat block as a postcard. 
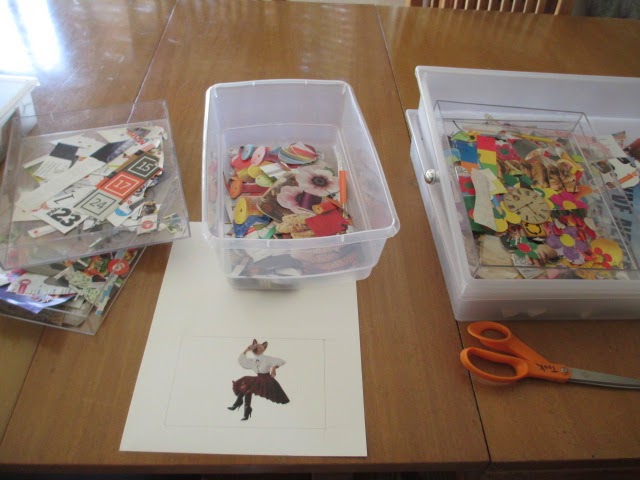
I traced the 4x6 size onto Bristol board and started digging around for things she could be sitting on.  The main problem was that the item would also need to have something for her to be leaning her elbow on, not just sitting.  I like these colorful spools...but it was too far of a stretch for her elbow...she'd have to be leaning backwards to touch the one behind her and it even though I really liked the colors and dimensions, it just wasn't working for her elbow.
Hey -- a rattan chair...
...maybe.
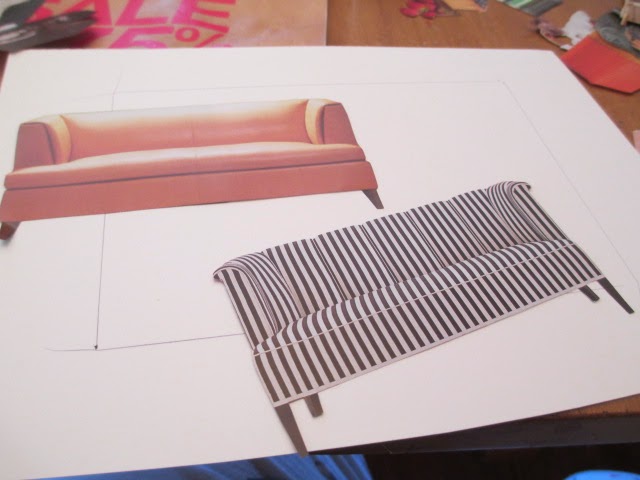
A couple of sofas...
...the leather one is just too plain...
I like the striped one...and I found a little dog, too.
Here is a possible idea...she is maybe thinking of what she wants to plant in her garden this season...not sure I will stay with this...not glued down yet.
Then I went back to the alligator toy.  I knew the new shape I wanted for the head...but how to make the transition from thick neck to new head?  I found a small section of cardboard tube that already had a few layers of plaster cloth and gesso.  It cut pretty easily with scissors.  I wanted to give it something to hold onto the body with.
Then I cut slits into the other end for the head parts to be inserted into for strength/stability.
I wanted to use very lightweight materials so that the plaster cloth won't be too heavy and push the head downwards.  I ended up not using the plastic lid.
I like the flatter head better...for now.
I put masking tape all around it and secured it to the toy body.  By this time I needed a break from this again.
I thought about how I could put the bear print onto the Bristol board and just went with the easiest/driest method...glue stick.
The back of the postcard (for now).
The front of the postcard (for now) -- I am happy with how close I got the edges...the carving is not exactly 4x6.
The tonight I decided I wanted to get some plaster cloth onto the alligator toy.  I took this small project out to the dining room table and worked on a plastic trash bag.  No time to take process photos...just the end results.
His new head -- so far.
The repaired section of tail...so far.
I couldn't get the two body sections to work with plaster cloth.  I am going to have to make the surfaces as smooth as possible (take away more of the old joining cloth) and try to epoxy the two halves together first...then put on the plaster cloth.  A project for another day.
How it is looking so far...not too bad.

Okay -- I finished the update/edit at 12:26...that is enough for tonight!


Saturday, December 21, 2013

365/2013 - Day 354

practicing the shirt

Today I had the "brilliant" idea to maybe avoid painting the young dog guy's shirt by cutting papers to color it instead.  I traced the shirt and sleeves (it is supposed to be sort of a baseball shirt style) and cut some practice papers to see a few different combinations.  

Oh -- and in the meantime while I was cutting the papers, Twink decided to "help" and was making me nuts so I gave him one of his catnip fish...he got a bit 'nipped.

All ready to get started on practicing with the papers.
Gah -- Twink wants to "help" -- he helps by rolling and rubbing and flipping around until he knocks something onto the floor and then acts all innocent and adorable.  Yeah.
I tossed him one of his catnip fish.
That worked -- now he is all 'nipped and wants no part of my papers!
The first sleeves - cut from the "wrong" side of some beautiful marbled paper.  I was thinking of this young dog guy being painted in light or pale blue...so I don't know if these sleeves will work, but they look good.
And a pale blue piece of mulberry paper for the body of the shirt.
Or how about the "right" side of the marbled paper -- no...too busy.
But I do like this pale blue paper -- it is like other papers already in the collage background, only it is blue.  It will definitely let the dots and other things show through.
But then again...how about a different "wrong" side of another sheet of marbled paper?  And an egg yolk yellow shirt part?
Maybe the other yellow is too strong...maybe just another layer of the same yellow from the background.
Or maybe the strong yellow underneath with the pale yellow on top -- I am pretty sure stuff will still show through like I want it to.  Decisions...decisions...


And later on in the evening I got busy cutting the last of the bodies for the Animal People...then I noticed it was already 11 so I stopped to come in here to post this blog entry before midnight.  There are only 3 images left to go!


I will cut those last three bodies out and then start thinking about the collage some more.  The papers will look different once they are put in place with the matte medium.  I wish there was a way to practice that before making my final choice.  Hmmm...

Thursday, December 19, 2013

365/2013 - Day 352

finally committing to a collage guy


It took me an incredibly long time to find the first photos of this repurposed canvas, but here they are.  


Original painting from a Salvation Army store -- "before"...this was started back on December 23, 2012.
The first few pieces of art papers are applied.
The canvas and its new look -- wet.
The next time I played with the collage was around February 2 or 3 of this year and I found this dog.


Fast forward to now -- I can't believe it has been this long -- but tonight I finally tweaked this guy into a definite young dog guy.


The canvas as I first looked at it tonight.
I used Peggy's chalk trick to outline another image I saw.  It is hard to make it out, but unfocus a little and you can see the shapes within the white marks...it is like a dog woman looking downwards.
But no, the other dog fought to stay as the main character...but he needed tweaking.  Bigger circles around his eyes...change his neck, change his taller ear.  He was originally going to have a sort of pointy party hat but I couldn't see it any more.
After many changes --- ta-daaa -- here he is -- a young dog guy. 

I like him!
Related Posts Plugin for WordPress, Blogger...