Showing posts with label decorative papers. Show all posts

Wednesday, November 5, 2014

Day 309 - 365/2014

Day Three Hundred Nine

Tonight -- on the bowling pin cat-creature -- I started layering on decorative paper that has leafy inclusions in it.  I worked in two sessions.

First session was pretty much just the face and head.  This paper seems to have a front and back to it and one side is more full of inclusions, the other is more plain.  I tried to use the more plain paper for the face...hoping to keep the details of the nose and mouth. In these first session photos the matte medium is still very, very wet.


In session two I tore up more paper and tried to cover as much as I could, leaving the tail for later.  I have a bare spot on the rear view bottom, but I will get that first in the next session.  I am pretty happy overall with how it is turning out so far...we'll see how well it all dries.


I am hoping to add more decorative touches...maybe some stripes or something...not sure yet.  My first thoughts were to give him the black "undercoat" with the subtle inclusions and see if a lighter, thinner paper would lighten him up a bit.  It is still way too early to say for sure. I think I will be making paper eyes for him...probably, anyway.

Sunday, May 20, 2012

2012/365 - Day 141

tweaking the foxish-creature collage

Today I am reining myself in and making me work on things with a closer deadline.


I forgot to take a photo of the collage before I adhered the paper, so this is an older dark one...but it is how the collage looked.


This is a collage that I submitted for consideration and didn't get juried into a different show earlier this year.

I like this guy, but since I have been working with the repurposed canvases more I realize I can do more to make the foxish-creature stand out from the background.  I am working on him today and I will try him in another upcoming juried show. 

For anyone who is keeping track, this is canvas #4.

I wanted to make his hat look more like a hat and be easier for the viewer to see what I am seeing.

I didn't want to paint the areas because I didn't want to not be able to make changes and didn't want the surface to get too thick...I wanted it to stay somewhat transparent enough to still be able to see the collage (and painting) underneath the images.

I made a pattern of one of the sections of the hat with butcher paper (because it was handy and I could see through it).

I placed the pattern on this decorative paper.  I like the red background with the gold leaves and I was thinking it would be small enough pieces not to be able to see the whole design on the paper.  (Still with me?)


I tore pieces of the cut-out paper and laid them onto the area.   Okay, but not quite "it".


I did myself a favor and found an actual piece of tracing paper.  Then I cut out another pattern from a decorative blue paper that has inclusions in it.


I tore pieces again and I like this better. 

It isn't as jarring as the red, but it is still pretty stark.


I adhered the torn bits of paper to the area with gel medium.

I like it.  I like the way the torn edges are sort of feathery and not cut-looking.

What next?

I knew I still had some of the polka dot tissue paper that I used in other collages.  I think it will work well here because it will be more transparent and be in the same sort of color range.

I also cut out a piece of purple paper with inclusions to try out on the top of the hat.


I laid down the polka dot paper with gel medium and I really, really  like it.  I like the separation between the stripes and the dots and I like the white part of the hat (I think).

I love the way that the polka dot paper allows you to almost see through it to the layer below.  You can see my shading that I was so happy with, and you can still see part of a tree from the original painting...in person you can, anyway.

The purple is still not a "go" yet...I think it might be too solid.  The color is okay, but I don't know...


I cut out a piece of almost olive mulberry paper.  

I was thinking maybe the creature's shirt will partially match the top of his hat.  Again...still not sure...but this is what I've got so far.
Thursday, March 8, 2012

2012/365 - Day 68

great timing!

I got all of those wonderful papers at Hollander's in Ann Arbor yesterday and today the two jugs of Golden Matte Medium arrived!


Twink, table dancing a tribute to UPS and art supplies.


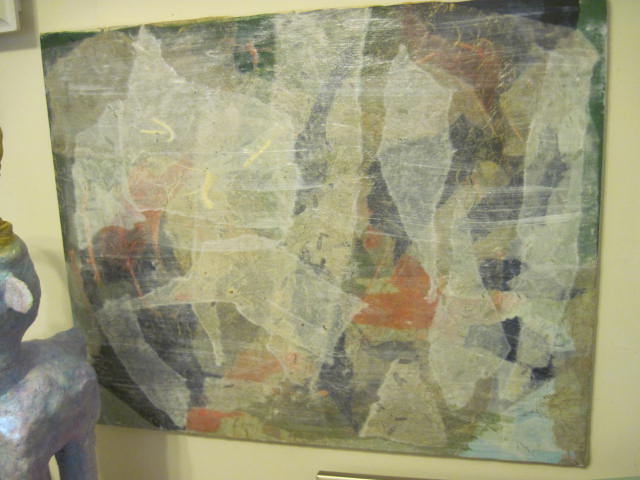
I chose several colors of unryu paper (black with gold threads, sienna, forest, and taupe) and two tamarind leaves sheets (one was labeled white/green, and the other was one I already had -- with no tag).

I grabbed my trusty brush and the end of the jar of matte medium and got to work.


I started out by half-thinking about what I was doing and half-deliberately tearing shapes and placing them on the canvas...going at it from one direction. I liked the colors and I also ripped out a few sentences from Capricorn horoscopes (the originator of the canvas and I are both Capricorns)...but it just wasn't feeling like the last few canvases. This was way more of my conscious participation than ever before. Then -- thankfully -- the guides decided to show up.


I was lead to cover most of the canvas with the taupe unryu paper that I hadn't used yet. It seemed to help pull everything together. You could still see the colors pretty well, but now they weren't so stark and contrived looking.


Then I was called back into the studio and lead to the other slightly heavier papers with inclusions that have made the other canvases feel more "finished" and almost smooth. That made all the difference! I tore these pieces without thinking about what I was doing and let them sort of drift down onto the canvas and brushed on the matte medium where the papers landed.


This is another view of the canvas after the guides were through...and with the overall covering coat of matte medium.


And here is canvas #5 -- very wet -- drying on the wall in the drying spot.

It will be really interesting to see what emerges through the layers of this one!

Sunday, January 22, 2012

2012/365 - Day 22 part 2

checking on the paper


The next few layers of paper went very well...as did work on another section.

However, I really messed up the face. Man...this must be a sign to wait until tomorrow.


It is seriously messed up.

2012/365 - Day 22

blogging about it without revealing too much

Man -- I just spent a couple of hours (hopefully) solving the dilemma of the bottom of the base of the cat-creature. I feel okay with blogging about this (even though I said I wasn't going to show more until I deliver it) because it doesn't really reveal much of what is going on elsewhere.

When I was building the base part with the plaster cloth triangles and strips I wanted to keep the very bottom (that sits on the floor) as even as possible so that the cat-creature wouldn't be tippy.

But now it has come time to figure out how to finish off the bottom and work it into the base. I still need to keep it as even as possible.

Back to those remaining Trader Joe's bags that I have been using on the Working Dog. I dug out the jar of Yes! glue and cut little pieces where there were already deep creases in the bags and glued them to the bottom of the base. Man -- that YES! glue is seriously sticky...it is also a very old jar. Maybe the glue isn't supposed to be that thick.


I think the idea is a basically good fix because the bags are kind of thick. But that was also the problem with this fix...the bags weren't very cooperative because they weren't getting very wet. The YES! glue is incredibly thick and gooey, but not really wet. I had to change my vinyl gloves four times because they got so icked up...LOL.

So I was looking at the completed ring of paper bag pieces and the Universe/my collaborators stepped in. I got the idea suddenly to use triangles of decorative paper and matte medium. It is wet and the paper will soak up the liquid and it goes with what else I've been doing. YAY.


Well...it seems to be working (so far). I think it will need another layer but right now I need to walk away from it.

It also appears that this was a really good fix for areas within the interior with the chicken wire where the plaster cloth didn't want to stay. Another YAY!

I will check back in later tonight.

Thursday, January 19, 2012

2012/365 - Day 19

gorgeous paper


The only thing I am saying about what I'm doing today is that I am working with this gorgeous paper from Hollander's in Ann Arbor, Michigan.


On this side it is marbled and glittery in small areas...


...and on this side it almost looks tie-dyed.
Related Posts Plugin for WordPress, Blogger...