Showing posts with label goat-creature. Show all posts

Monday, April 9, 2012

2012/365 - Day 100

wow -- what?

Wow -- it sure doesn't feel like we are one hundred days into the year already. 


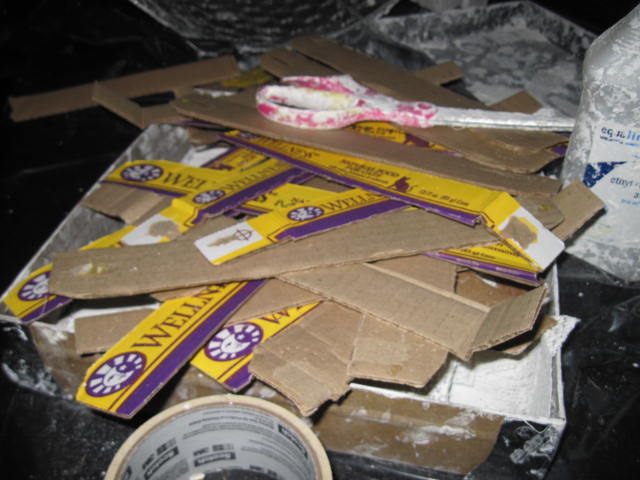
Last night I was cutting up the cardboard trays that the cat food cans come in.  Today I realized that I could use the ends of the trays, too.  Duh!


I cut the strips into little pieces...


...and they work pretty darn well to fill in gaps between the tomato cage grid and the chicken wire inside of the base...however...


...there are still some areas underneath the tomato cage and chicken wire where the chicken wire doesn't touch the aluminum foil.  I will still have to figure that part out before I try to add masking tape and plaster cloth.

It is sort of strange re-starting a project like this.  The cat-creature's chicken wire base was done so differently compared to this one.  To come back and try and work out the mistakes in this goat-creature quite a challenge.

Sunday, April 8, 2012

2012/365 - Day 99

from the recycle bin

Monday is trash collection day on my street and I was just looking around getting stuff bagged up for the morning.  I have a fairly good sized box of cardboard to go out for the recycling bin and it occurred to me I might put some of it to even better use myself.


 Pookie and Avalon eat canned food twice a day and I have loads of these cardboard trays that I normally toss into the recycle bin.

There is a LOT of surface to cover and even out on the goat-creature.  Hmmm...


I cut up one of the cardboard trays and filled in the gaps underneath with folded paper rags.  Then I taped them onto the goat-creature.


I used a combination of paper rags underneath and wadded wet plaster cloth on the edges to add more strength.

I tried a couple of different ideas to see what will work the best.

The goat-creature was turned a bit to put the wet area facing up.

I hope this works out...it will save lots of time, plaster cloth, aggravation, etc.  

I am still thinking about what to do with the inside.

Friday, April 6, 2012

2012/365 - Day 97

oh -- I have such lofty plans lately

 Yeah...the goat-creature is definitely my current main project, but there is no way it will be even close to partially done by the time that first deadline comes around.  There are so many basic structural problems and challenges with this guy, but I am determined to find ways to work with him.


I didn't quite know where to start tonight.  I finally thought maybe if I put a second tomato cage inside of the base it would strengthen things...so I cut off the top four "legs" of this cage.


I picked the goat-creature up and lifted him onto the second tomato cage -- and it was pretty entertaining -- I thought I was going to knock off one of his horns when I hit the ceiling with him.  Right now he is still very lightweight but he is fairly tall.

This is how it looked inside with both cages.  Bottom line is I don't think it is going to help.  It didn't make any real change and that would be one more set of parts that don't touch the chicken wire in places.  Harumph.


So I decided to work on the outside of the base.  It is so flimsy-feeling compared to the cat-creature.  I don't even know what I did differently...I will have to go back through the blog and look at how I made her skirt.

This is where I am going to try to work on the goat-creature.  His head is supported by another tomato cage section -- it is one that I cut from the twirly sprinkler thing (ex)bear-creature.


The goat-creature is SO dry.  I couldn't get the plaster cloth to stay wet enough to adhere to the surface of the base.  I tried spritzing it with hot water but that just made my hand tired...the water kept absorbing as fast as I could spray.  I ended up going back to my old standby -- the Scott Rags.

Now that I think of it, this is probably how the cat-creature's base was toughened up.

I took a section of paper rags, soaked it in the water and then laid it across the d-r-y plaster cloth surface.  I didn't knock much water from the plaster cloth as I pulled it from the water bin.  It seemed to work fairly well.

It is hard to see in the photo, but this is a shot of the wet wet paper rag on top of a layer of plaster cloth that didn't want to get smoothed out because it wouldn't stay wet enough.  This is what I was laying more wet plaster cloth on top of.

It was about at this point when I had to give in and accept that the goat-creature is going to be a l-o-n-g time in the making and will not be ready for the first upcoming deadline.

It's okay.  I really like him a lot.  I want him to turn out well and I am willing to put the time in on him.


This is how the goat-creature looked after about an hour of work.  This is a small section of the base.  I wanted to stop at this point because #1 I was tired and #2 I need to see if all of this work is going to actually do anything.  LOL.


(Oh...I almost forgot to whine about how much I hate this new editing/posting thing.)

Sunday, December 18, 2011

update for 365 Day 351

Update


Yay -- I got one layer of plaster cloth on the goat-creature be
fore I went to bed tonight! (It is still Saturday as far as I'm concerned...I haven't gone to bed yet.)

It cracks me up to try and take a photo in the mirror.

Saturday, December 17, 2011

365 Day 351

working on the goat-creature's base

I don't know yet what he will turn into for sure, but I really needed to work on his base tonight.


I started out wrestling with the chicken wire and cutting it with the goat-creature down on the floor. But it got to the point where I couldn't work on it upside down from my chair.

I put the goat-creature up on the big work table in my studio (hit the light fixture lightly with his horns) and started to affix the chicken wire to the tomato cage with the thin wire that came with the chicken wire to keep it from unrolling. (as if that would be a problem...you have to work to get it unrolled)


I used the thin wire to "sew" the chicken wire to the tomato cage.


I got about half-way around the base and up two legs when it just became too much to try and work in the plaster cloth'ing area. There is stuff there that needs to be on the table and it was easier to just give the goat-creature a separate table.

It actually is a mate of the big table.


There -- that is more manageable -- and no light fixture to bump into.


I cut off the excess chicken wire at the top of the figure.


I continued to sew the chicken wire to the tomato cage.


Yikes...those wires are kinda pokey!


Everything went pretty well by overlapping the chicken wire -- except this area -- but I think it will work itself out once I start plaster cloth'ing.


Now to get rid of those pokey wires!


The masking tape is only half holding the wire ends...I am also squeezing them to the lip of the upper form. (I think it is an upside down plastic hanging planter from a plant that got a bit fried this summer.)


Another layer of tape to hold the first layer of tape.


I am going to use aluminum foil to cover the chicken wire this time. I hope it works okay.


I mean, it is going on just fine...


...and I am crimping it down over those pokey wires to block them even more...


...but I am not so sure how well the plaster cloth will do on the aluminum foil over the chicken wire.

I think it will be fine if I kinda smash it as I smooth it. I want it to grip without having to do the inside, too...but I think I probably will have to do the inside. This guy is going to get heavy.

I need to feed the cats and take a break...give my hands and back a rest for a bit. I'd like to think I will get back in here sometime before bed and get the plaster cloth on the outside of the base...but I most likely won't...we'll see.


Related Posts Plugin for WordPress, Blogger...