another lovely Wednesday Morning
I really love Wednesday Mornings with Joan and Leann! (satisfied sigh)
I started out by trying to figure out a way to paint little dots. I tried the ends of a couple of paint brushes, the eraser end of a pencil, a broken in half cotton swab, and a spongey sort of paint brush. I think it is just going to come down to doing it very very slowly and totally concentrating on each dot -- like meditation or something.
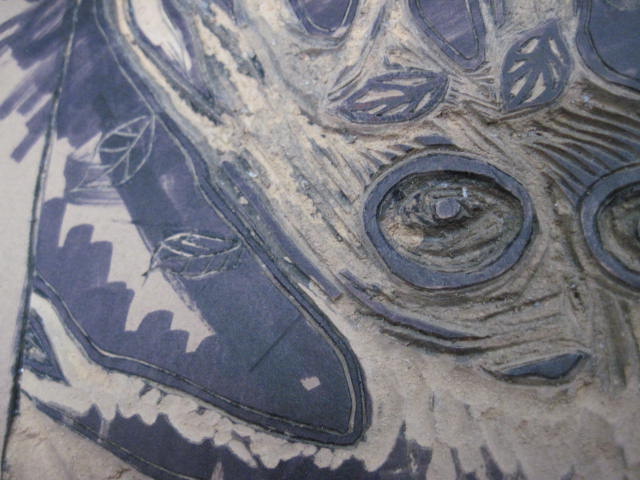
After that I moved on to carving little stamps that I may be able to use on a different plaster cloth guy. I had been considering doing this, but because Leann was carving stamps (an alphabet) I had to copy her and work on the carving.
All too quickly it was time for Joan and Leann to go on about their days and I left my materials on the table so I could come back to work on the carvings some more. Funny thing is...I went back to it about a half hour after they left and I am just NOW "done" (5:15 p.m.)...where does the time go???
I don't know how many of these carvings will be useful on the plaster cloth guy, but they will be useful overall.
Yay -- I think I've got itThis month in the ATC Exchange group our themes are Fall/Halloween. At the last meeting when it was announced I thought, "Cool -- that sounds pretty easy...I love Fall...I love Halloween. It will be relatively simple to choose something to do!" Ha! It turns out that for me, having a way wide open choice is pretty difficult. Fall means so many things to me. Halloween images go on forever. How do you choose one main idea???So many iconic Halloween images have been swirling around in my head the last few days while I was thinking about this...candy corn, ghosts, black cats, witches. I switched gears and tried to think of Fall...leaves, Indian corn, corn stalks, apples...nope, too many again. I had to narrow it down to an absolutely Halloween image with a capital H...and it had to be something I could execute and repeat over several cards, yet make each one individual. Hmmm...what is the very FIRST thing that comes to me when I think of Halloween/Fall? Carving pumpkins! One of the things that I learned in that linocut class with Shaqe Kalaj at Art & Ideas Gallery was to trust my own drawings. I feel a bit more confident with that now.So -- here goes...draw a carve-able pumpkin.
 My trusty "Black Warrior" pencil helped me make a simple transfer of my drawing onto the carving block.
 It's fuzzy, but I can see enough of it.
 Darken the lines with a medium Sharpie marker and get carving.I love the carving part!
 Hey...not too bad.
  Now to make a test card and try out my idea.
 I guess I will be carving Jack o' lanterns this season!
This is just the test card, but I am happy with the idea.I need to get some more orange-y inks and some more vivid yellow paper. I think this will work!I need to practice my X-ACTO knife skills with carving out the faces on the pumpkins. No doubt it will go smoother with new blades and maybe a swivel-y style knife with a self-healing pad underneath. That's the plan, anyway! Then some embellishments, perhaps...NOW -- back to work on the sewing on the buttons for eyes on the second 50 Tookies finger puppets for my current batch of 100 for Art-o-mat. Then later tonight I can hopefully make a Tooklet or two. Heh...and sometimes people say to me, "You don't work...what do you DO all day long?"
how to draw animals (or at least get a basic silhouette)
For that "landscape" project I am working on, I need to start thinking of something else I can carve for the foreground...today I am trying animals. I am going to make 3 deep shadow box places/scenes/"landscapes" so I found 3 animals...2 rabbits and 1 squirrel. (I am really really afraid of rabbits outside in real life and I HATE squirrels -- rats with fluffy tails that literally eat the side of my house...but I needed smallish animals.)
 A while back Andi gave me some magazines and a couple of Walter Foster "How to Draw" books. I remember those from my childhood, but it was always my sister Sue who had the drawing talent. The two books that Andi gave me are actually from back then, not reprints...pretty cool!
 These pictures are large for the most part. I knew I would be reducing the sizes but I needed to find simple-ish animals that I might possibly be able to draw an outline of.
 Working with the size I need -- plus this is a landscape -- I knew I wouldn't need a lot of details for these carvings.
 I really did give drawing them free hand a try.
 Not too horrible, but I knew it would be a lot quicker and a lot less frustrating to just copy the pictures, reduce the size and draw an outline over them.
 So that's what I did...
 I worked on them for an hour or so and then got my carving stuff and area ready.
I tried to let Twink stay out with me but he was just too disruptive and playful again. Honestly, if I am not at the dining room table trying to do something like this he has already put himself back to bed in the bedroom anyway. He sleeps a lot in there...he is a cat, you know?
I worked on them for an hour or so and then got my carving stuff and area ready.
I tried to let Twink stay out with me but he was just too disruptive and playful again. Honestly, if I am not at the dining room table trying to do something like this he has already put himself back to bed in the bedroom anyway. He sleeps a lot in there...he is a cat, you know?
 Here is the squirrel. The photo is a bit blurry, but also the image I ended up carving was pretty much as blurry as you see because I had to reuse a couple of scraps of carving material and the running rabbit didn't fit on the piece I planned on using so I had to try to remove the image and blah, blah, blah...LOL. Whatever...this is how it looked.
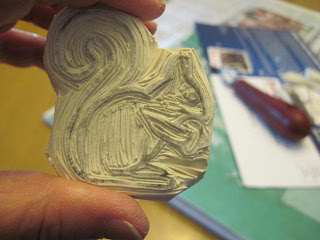 And I carved that image right away so that I would sort of remember how the lines felt and looked when I transferred them.
 The running rabbit...this is really creepy/scary to me.
 The sitting rabbit...also a little unnerving to me.
 I will probably clean these up a little as I use them but I wanted to be done with carving for today...close up work/old eyes/cramped hands.


 And here is the whole "landscape" elements set so far...growing nicely.
 Packed up and ready to let Twink back out of the bedroom.
starting a new classToday was the first session of a new 8-week class I am taking at Art & Ideas. It is a relief printmaking class and I am already in love with it. Our teacher is Shaqe Kalaj, the gallery's Artist in Residence. She is charming and patient and creative and I love her work.
Shaqe Kalaj in the studio/classroom area of Art and Ideas with some of her work behind her.
Tonight we had a brief introduction to printmaking and learned about various printing techniques and terms and saw examples of many of them. We were given the embellished sketchbook of our choice for drawing and sketching during the course and also a thin Sharpie marker and a Speedball carving tool with multiple blades. 
the notebook I chose
We explored shape, line and texture and used these to experiment with the carving tool on a piece of soft-cut gray material. First we made marks with the different blades to get a feel for what each one did and how the material cuts. Then we were shown how to ink the carving and made our first print with the block.

my first print of the night -- exploring the blades and carving material
Next, using the same block we had just experimented on, we cut away most of the surface with more random, free-form lines and shapes to create texture. Then we made a print from that surface.

my second print -- from the same side of the carving material, but with more surface cut away
Next we turned the carving material over and used the other side. We chose a shape and experimented with variations on it...size, placement, using the different blades. Then we made two prints of that block. We discussed our prints and Shaqe talked about some of her carvings that are there in the studio. She shared some of her experiences with printmaking and how she does things.

my side two and the two prints I pulled
Next we turned to our sketchbooks and Sharpies. (I tensed up...you know I don't draw very much.) We were instructed to use the word "Wild" and show: Shape, Line, Direction and Texture. Shaqe wanted us all to do the exercise together. We were to just make "Wild" marks on the page. (I need to learn how to relax and let go of my death grip on my pen and not over think things...stop being such a Capricorn...LOL) By the end of the class I started to understand what this part is about. By doodling and just making random marks on the page you can start to see images and shapes in there that can be pulled out and used for carving and printmaking. (Oh...now I get it)

my sketchbook page -- now that I am home I am beginning to see some shapes in there...and by playing with it more and darkening lines and filling in spaces I will be able to bring out a couple of ideas -- it is starting to "click"
I think I am really going to enjoy this class and I am already starting to get more out of it than I realized...things that will help in other areas of my art. I really appreciate how willing Shaqe is to share her own process and experiences. I love that some of her art is there in the studio so she can actually show you what she is talking about and you can relate to it because you see and hear the artist walking you through a section of the piece. (This helped me immensely to understand the concept of doodling and finding shapes/images in the doodle -- when I TRY to draw the imaginary creatures in my head they don't really transfer to the paper. If I just let go and do it intuitively -- like I have been doing with the plaster cloth...let my "self" take over for a few minutes -- things will come together.)
Shaqe is a wonderful teacher...and three hours felt like about 15 minutes...I can't wait for the next session!