I'm falling in love with this project
YAY! This is the sort of thing I was hoping for -- that I could let go of the idea of "landscape with a capital L" and just make a "places" inside of a deep shadow box...and submit them to the show and not be concerned at all if/when they don't get juried in because I love them so much that I will be hanging them on my walls in my house anyway. And I am only partway there!
 Okay. Remember this is how the uncarved linoleum block looked the last time I messed with it. And remember I said it was no big deal because I could still carve on it?
I have been playing with the idea of either a pretty piece of handmade paper (or layers of colors of paper) or a watercolor-washed sheet of watercolor paper as the background for the shadow box scene.
Okay. Remember this is how the uncarved linoleum block looked the last time I messed with it. And remember I said it was no big deal because I could still carve on it?
I have been playing with the idea of either a pretty piece of handmade paper (or layers of colors of paper) or a watercolor-washed sheet of watercolor paper as the background for the shadow box scene.

Today I figured out that -- duh -- wouldn't it be good if I tried to carve one?
I traced a circle onto the block.
 I started carving it out with different sizes of blades. That was going to be a LOT of carved out area, so I wanted to vary the carving marks.
 I have never carved in this way before. I didn't make an outline circle, I just started each gouge at the line and carved away from it, trying to keep the edge even.
My original idea (and I'm not positive I won't still do this) was to carve vertically for the sky and then carve the sun/moon horizontally or diagonally with really thin lines.
I have never carved in this way before. I didn't make an outline circle, I just started each gouge at the line and carved away from it, trying to keep the edge even.
My original idea (and I'm not positive I won't still do this) was to carve vertically for the sky and then carve the sun/moon horizontally or diagonally with really thin lines.
 While I was carving I thought I would try to leave some surfaces that might look like tree trunks. I did it without lines. I was thinking I might cut really thin lines or patterns into the trees...that is still undecided, too.
 Here is the first test print on just plain newsprint. I used my Speedball Red Baron baren instead of a plastic spoon for burnishing because the bottom of the carving is so flat and the top is so open.
Not bad for a first try.
Here is the first test print on just plain newsprint. I used my Speedball Red Baron baren instead of a plastic spoon for burnishing because the bottom of the carving is so flat and the top is so open.
Not bad for a first try.
 Second test print. There are a lot of ideas floating around in my head about how to proceed with the carving of this block, but I kind of like it like this and I need to look at it for a bit longer.
I was planning on making each of the mostly vertical sections of the hill have individual diagonal lines...maybe make some rock-like gouges every once in a while. We'll see...
Second test print. There are a lot of ideas floating around in my head about how to proceed with the carving of this block, but I kind of like it like this and I need to look at it for a bit longer.
I was planning on making each of the mostly vertical sections of the hill have individual diagonal lines...maybe make some rock-like gouges every once in a while. We'll see...
 In the meantime I got the idea to stamp out a bunch of the images and play with how they could look together.
I needed a lot of trees. These are the bigger ones.
I love repetition!
In the meantime I got the idea to stamp out a bunch of the images and play with how they could look together.
I needed a lot of trees. These are the bigger ones.
I love repetition!
 Yep, yep, yep. I am really loving these individual stamps. I have about a billion ideas of how to use them right about now...and ideas for more images for the set.
These are the smaller trees.
Yep, yep, yep. I am really loving these individual stamps. I have about a billion ideas of how to use them right about now...and ideas for more images for the set.
These are the smaller trees.
repetition, repetition, rep-e-TITION! sung to the tune of "Levitation" by Hawkwind.
 The stamped and cut out landscape elements along with the test print background.
 This is cracking me up -- I love it!
This would be dimensional in the deep shadow box. Pretend like you can see behind things.
I just laid these out to see how it might look.
The stripey hills with the sitting rabbit.
This is cracking me up -- I love it!
This would be dimensional in the deep shadow box. Pretend like you can see behind things.
I just laid these out to see how it might look.
The stripey hills with the sitting rabbit.
 The plain hills with the squirrel.
 The running rabbit and both hills.
In this scene that large cloud almost looks like the top of a tree over those three trunks. That gave me another idea for more carvings!
Wow -- like I said, I am really falling in love with this whole project! The possibilities are pretty much endless. It's funny. I started out making art by rubber stamping back in the late eighties. I even had my own mail order rubber stamp business. I still have the vulcanizer. Hmmmm...
But for now, maybe I can make loads of variations of these little shadow boxes and put them in my Etsy store...if I get that ambitious!
The running rabbit and both hills.
In this scene that large cloud almost looks like the top of a tree over those three trunks. That gave me another idea for more carvings!
Wow -- like I said, I am really falling in love with this whole project! The possibilities are pretty much endless. It's funny. I started out making art by rubber stamping back in the late eighties. I even had my own mail order rubber stamp business. I still have the vulcanizer. Hmmmm...
But for now, maybe I can make loads of variations of these little shadow boxes and put them in my Etsy store...if I get that ambitious!
making watercolor choices for ATCs
Get ready for a long-winded rant/explanation/bit of background info. I won't be offended if you skip down to the actual subject of the post...LOL.
You may know how much I hate to paint. There is nothing I like about it. The smells, the feel of the paint, the textures, the mess, the little bottles, tubes, choosing colors, mixing...none of it. I am talking about acrylics and craft paints. Admittedly, I have never tried oil paints but I think it would be all of that, mulitplied...adding in the smell of turpentine and brush cleaners and bigger messes, etc. And it isn't that I am afraid of a mess...you've seen my studio...it's that I can't paint (or use rubber stamps, inks, glue, etc.) without getting it all over...and I tend to walk around with colorful hands for a day or two after I paint. I just don't like it.
But -- (also admittedly) I haven't minded it as much at Experimental Art Nights -- as I have previously blogged. Most of my painting usually deals with putting color and detail on 3D things like my plaster cloth guys or boxes or that sort of thing...and I have big expectations for those things because I imagine them in a finished state in my head and they never turn out that way in real life. I have had very little flatwork experience...and I think that could be one of the reasons I hate the Experimental Art Night playing around with paint a little less. No expectations of what is to come.
Okay. All of that said...
 As much as I loathe acrylic painting, that is almost as much as I enjoy watercolor painting. I like just about everything about it. I am in no way trying to hint at saying that I know what I am doing with watercolors or that I know how to work them properly. I took a 12-week class that I stayed in for about 5 weeks and I know I have only scratched the surface of working with them.
BUT --
Watercolors make me feel like I can paint. I like how they blend so easily...pretty much without me doing much but putting color someplace and then playing with it. I like how they change so easily and effortlessly. HA -- that is probably it in a nutshell -- it feels nearly effortless.
I like how watercolors look. I like the paper, the little trays of paint, the tiny tubes of paint, the stackable palettes of colors. I like that there are really inexpensive ones and really expensive one. I like experimenting with them. I like how you can build up the colors...and then change them with a drop of water or a mist from a bottle of water.
Perhaps someone is going to tell me that you can do all of that with acrylics, too. Well perhaps you can, but I can't.
AND watercolors are as close as I have to come the Amaco watercolor underglazes for ceramics -- which I just adore. And that brings me around to this particular project. The images I am using were originally drawn and designed by me as ceramic tiles. I used watercolor underglazes to color them, then used Duncan French Dimensions to outline them and finished them with clear gloss glaze.
As much as I loathe acrylic painting, that is almost as much as I enjoy watercolor painting. I like just about everything about it. I am in no way trying to hint at saying that I know what I am doing with watercolors or that I know how to work them properly. I took a 12-week class that I stayed in for about 5 weeks and I know I have only scratched the surface of working with them.
BUT --
Watercolors make me feel like I can paint. I like how they blend so easily...pretty much without me doing much but putting color someplace and then playing with it. I like how they change so easily and effortlessly. HA -- that is probably it in a nutshell -- it feels nearly effortless.
I like how watercolors look. I like the paper, the little trays of paint, the tiny tubes of paint, the stackable palettes of colors. I like that there are really inexpensive ones and really expensive one. I like experimenting with them. I like how you can build up the colors...and then change them with a drop of water or a mist from a bottle of water.
Perhaps someone is going to tell me that you can do all of that with acrylics, too. Well perhaps you can, but I can't.
AND watercolors are as close as I have to come the Amaco watercolor underglazes for ceramics -- which I just adore. And that brings me around to this particular project. The images I am using were originally drawn and designed by me as ceramic tiles. I used watercolor underglazes to color them, then used Duncan French Dimensions to outline them and finished them with clear gloss glaze.
 Okay. Back to today.
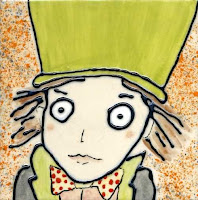
Today I am just experimenting with the materials on hand to see what I'd like to use for next month's artist trading cards. The theme is characters from children's literature and since Alice in Wonderland/Through the Looking Glass are a couple of my favorite stories I decided to adapt those original images to ATCs.
Okay. Back to today.
Today I am just experimenting with the materials on hand to see what I'd like to use for next month's artist trading cards. The theme is characters from children's literature and since Alice in Wonderland/Through the Looking Glass are a couple of my favorite stories I decided to adapt those original images to ATCs.
 These are the paints I chose to use.
Click the photo for a link.
These are the paints I chose to use.
Click the photo for a link.

 Next, Strathmore heavy weight cold press water color paper...but which side to use?
This is the smoother side.
Next, Strathmore heavy weight cold press water color paper...but which side to use?
This is the smoother side.
 This is the rougher side.
 I printed out nearly b+w versions of my designs onto the paper using my computer.
The images are elongated to fit the 2x3 choice in my photo printing program thingy.
I wasn't sure if the printer ink was going to smear once the watercolor hit it. It didn't seem to make that much of a difference...yay!
I printed out nearly b+w versions of my designs onto the paper using my computer.
The images are elongated to fit the 2x3 choice in my photo printing program thingy.
I wasn't sure if the printer ink was going to smear once the watercolor hit it. It didn't seem to make that much of a difference...yay!
 I played around with a bunch of small brushes and I LOVE this brush -- it has a tiny end, makes totally straight lines and edges and also does wide strokes and washes.
Yay -- an "all-in-one" for the non-painter!
I played around with a bunch of small brushes and I LOVE this brush -- it has a tiny end, makes totally straight lines and edges and also does wide strokes and washes.
Yay -- an "all-in-one" for the non-painter!
 Experimenting with layering single colors and putting paint over the lines and with keeping it within the lines.
 I really like to watercolor!
 Just playing around...the colors blend so easily and make me feel like I can sort of paint (even though I KNOW it is all happening automatically...the paint and water are doing it themselves.)
Okay -- that was cool -- got stuff off my chest and into words onto the "page" for my own sake -- and made some choices and decisions for the ATCs for the trade next month. I really am well aware that I don't owe anyone any sort of explanation for anything that I do...but it is good for me to blog some of these insecurities and artist/non-trained artist issues that poke me every once in a while. I can go back and reread the posts and see how I was feeling at that particular moment. I don't always feel like this and it is good to see for myself that I am making progress. It is sort of therapeutic.
Just playing around...the colors blend so easily and make me feel like I can sort of paint (even though I KNOW it is all happening automatically...the paint and water are doing it themselves.)
Okay -- that was cool -- got stuff off my chest and into words onto the "page" for my own sake -- and made some choices and decisions for the ATCs for the trade next month. I really am well aware that I don't owe anyone any sort of explanation for anything that I do...but it is good for me to blog some of these insecurities and artist/non-trained artist issues that poke me every once in a while. I can go back and reread the posts and see how I was feeling at that particular moment. I don't always feel like this and it is good to see for myself that I am making progress. It is sort of therapeutic.
how to draw animals (or at least get a basic silhouette)
For that "landscape" project I am working on, I need to start thinking of something else I can carve for the foreground...today I am trying animals. I am going to make 3 deep shadow box places/scenes/"landscapes" so I found 3 animals...2 rabbits and 1 squirrel. (I am really really afraid of rabbits outside in real life and I HATE squirrels -- rats with fluffy tails that literally eat the side of my house...but I needed smallish animals.)
 A while back Andi gave me some magazines and a couple of Walter Foster "How to Draw" books. I remember those from my childhood, but it was always my sister Sue who had the drawing talent. The two books that Andi gave me are actually from back then, not reprints...pretty cool!
 These pictures are large for the most part. I knew I would be reducing the sizes but I needed to find simple-ish animals that I might possibly be able to draw an outline of.
 Working with the size I need -- plus this is a landscape -- I knew I wouldn't need a lot of details for these carvings.
 I really did give drawing them free hand a try.
 Not too horrible, but I knew it would be a lot quicker and a lot less frustrating to just copy the pictures, reduce the size and draw an outline over them.
 So that's what I did...
 I worked on them for an hour or so and then got my carving stuff and area ready.
I tried to let Twink stay out with me but he was just too disruptive and playful again. Honestly, if I am not at the dining room table trying to do something like this he has already put himself back to bed in the bedroom anyway. He sleeps a lot in there...he is a cat, you know?
I worked on them for an hour or so and then got my carving stuff and area ready.
I tried to let Twink stay out with me but he was just too disruptive and playful again. Honestly, if I am not at the dining room table trying to do something like this he has already put himself back to bed in the bedroom anyway. He sleeps a lot in there...he is a cat, you know?
 Here is the squirrel. The photo is a bit blurry, but also the image I ended up carving was pretty much as blurry as you see because I had to reuse a couple of scraps of carving material and the running rabbit didn't fit on the piece I planned on using so I had to try to remove the image and blah, blah, blah...LOL. Whatever...this is how it looked.
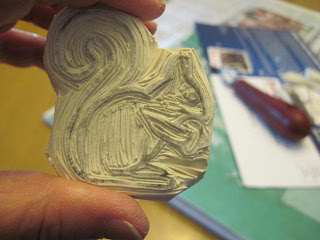 And I carved that image right away so that I would sort of remember how the lines felt and looked when I transferred them.
 The running rabbit...this is really creepy/scary to me.
 The sitting rabbit...also a little unnerving to me.
 I will probably clean these up a little as I use them but I wanted to be done with carving for today...close up work/old eyes/cramped hands.


 And here is the whole "landscape" elements set so far...growing nicely.
 Packed up and ready to let Twink back out of the bedroom.