printmaking progress
Today I am plagued with lots of allergy-related symptoms that are driving me nuts...Juana and I ran a bunch of errands this afternoon (a very needed diversion for me) and so I couldn't take any Benadryl because I couldn't count on whether it was going to knock me out or not. Sometimes it does, sometimes it doesn't -- but it is pretty much the only thing that helps my allergies.
ANYway...I got home and still needed to blog so I decided to try and print the block that I spoke about in the entry for Day 178. I tweaked it a few nights ago and had to keep re-carving the marks around the dots -- the dots are lightning bugs. The thin lines kept wanting to close up so I needed to use a black Sharpie marker to see where I was carving...LOL.
Lightning bugs have been escorting me home from printmaking class for the last two weeks. There still aren't any in my yard yet, though. They generally show up by the 4th of July. And that reminds me of my dad. I miss my dad.
This is the best print I could manage this evening...I am really really cranky and irritated by all this itching. I am okay with this print. In person you can see where I had to re-ink it and it just doesn't want to dry. Perhaps Shaqe will have suggestions in our next class (June 11) (that seems so far away!)
the tweaked block...I (tried to) clean up some lines, added the broken lines to the guy's coat and added the lightning bugs
the best print I could pull this evening
I really like this picture a lot, but I really don't like the material it is carved in. I think I may try to re-do it on the harder material.
Thursday, June 30, 2011
Wednesday, June 29, 2011
365 Day 180
another one of the plaster cloth guys
Today I have been working on another one of those plaster cloth guys.
First I coated him with gesso. Next he got a coat of the Neopaque Yellow paint that wasn't right for the edges of those Penciled In blocks the other day...it was great for this application! The third coat is a stab at dry brushing on a yolk-ier yellow paint that I had in my supplies stash.
I have an idea of how I want him to turn out...I will have to see if I can make him the way I see him in my head.
gesso coat
Neopaque Yellow coat
yolk-y yellow dry brushed coat
Tuesday, June 28, 2011
365 Day 179
painting plaster cloth guys
Okay, I bit off more than I could chew when I made all of those plaster cloth guys for (potential) submission to that local show. The one where you can have up to twelve entries.
I am so NOT a painter. I would like to be able to finish these guys more quickly, but I can't. I am fairly happy with today's results with experimenting with Montana Gold spray paint, but I am not skilled with paint, mixing/blending colors, etc...yet. I can't expect to be able to just pick up a new tool and know how to use it right off the bat.
I want to be happy with these guys -- I have put a lot of work into them so far -- so I am going to keeping plugging away at them but I won't have any of them ready in time for the submissions deadline for that particular show. Oh well. There is another show with a July 15th submission deadline. I can probably get something completed in time for that one.
you can't tell from these photos, but there are quite a number of layers of paint on these guys so far...LOL
(Update: oooooh man -- these guys are intensely painty smelling...gotta take them out to the garage! I sprayed them outside and brought them in to dry and take photos...LOTS of off-gassing going on! They are in the guest bathroom with the door closed and I am in my studio with the door closed and I can smell them in here!)
I like how this one is starting out, but I was really surprised that a lot of the paint is rubbing off near the base
this one really looks different in person
And it is not like all is lost. The student show that my relief print will be in is coming up on July 9th -- I am really looking forward to that!
Monday, June 27, 2011
365 Day 178
another material in printmaking class
Tonight in relief printmaking class at Art & Ideas, Shaqe gave us a new material to try. It is called Blick Wonder-cut. She also had us choose another of our sketch book drawings.
I went in all excited about that super hero drawing from a few days ago. Shaqe liked it but guided me back farther into my sketch book. Good thing she did, too.
We found this page. I was looking at the page as three or four separate characters/drawings. Shaqe helped me see that the three figures could work together as a piece. They also are closer to the earlier carvings I have done in class. This will all get pulled together later as we put our series together. Hmmm...sounds cool.
So this Wonder-cut stuff...I am not terribly fond of it. It has a surface texture to it to begin with. It also smells a little like cork...and acts a little like cork. It is a little bit spongy to cut. You put your blade into it and when you pull it back the material kind of closes up a bit. Hard to describe. Also, my outline lines are waaaaay wider than with the other materials. Both the softer E-Z-cut and the harder Blick Golden-cut tend to give you the line that you carve. This Wonder-cut material is very different.
I am very glad to have the opportunity to try out so many different carving materials. I know now that I like the Soft-cut gray for some things and I like the Golden-cut for others. I know you have to be more careful with the storing of the Soft-cut because the surface can get scratched and marred. The Golden-cut gives you a more hard surface for your block. The Wonder-cut is probably good for something that I haven't figured out yet. This class is really great!
Also tonight -- I delivered my completed bear-ish guy print, matted and framed, for the upcoming all ages student show. I am very excited about this show. The age range of the artists is 5-70 years -- how cool is that! You will have to wait to see the photos from the show...opening is July 9. I will post more about it as the date gets closer...and plenty of photos from the show.
we traced a detail from a drawing in our sketch book
then we played with variations of it
then we chose the one we liked and transferred the image to the Golden-cut block...you can sort of see the surface texture in this photo...kinda sorta tiny like bumps, sort of grainy but not...the material doesn't really crumble or anything
I have carved the outlines in this photo and taken out a little bit for white areas...you can see how much wider my outlines are...the material doesn't really want to be cut a whole lot closer...it is cork-like and soft-ish...you put your blade in and when you pull it out the line expands (or something)...hard to describe
it's not a bad thing, I just don't care too much for it in comparison to the other materials
a test print of the carving...this is actually the second print after I tweaked the first version...I'm not done with this yet and perhaps I will get used to inking the surface...I know I want to give it a background of some sort...I had an idea on the way home
Sunday, June 26, 2011
365 Day 177
done painting this batch!
Whew! I am done with the painting part for this batch of Penciled In for Art-o-mat...the collaborative series that I make with Juana Moore.
100 blocks with painted edges
two of those Neopaque Yellow edged blocks that needed to be repainted with Lumiere Bright Gold -- they look much better
a shot of the blocks
another view
Now, while they are getting thoroughly dry, I will work on other projects. Then I will come back to these and attach the twisty wire hangers on the backs. The labels need to be printed, we need to sign the backs, put the labels on the boxes, wrap up the blocks with tissue, insert the mini moo card with the info about our websites, put the cellophane/acetate around the boxes, pack them up and ship them off to Artists in Cellophane for distribution to around 90 Art-o-mat machines across the country...plus one in Australia, one in Canada and one in Austria. Click HERE to find a machine near you!
if you like our work, request it for your local machine
Labels:
Art-o-mat,
Artists in Cellophane,
Juana Moore,
painting,
Penciled In
Saturday, June 25, 2011
365 Day 176
math + me = what was I thinking
Why does it always surprise me when I don't calculate correctly (the first time) the length of time something is going to take me? If I try and figure out pieces per minutes (or miles travelled per hour) I always ALWAYS mess the calculation up and think it will take much less time than it does.
If I just "give" something an hour or two I am fine...but when I think I am going to be all efficient and plan stuff out per piece it never works. LOL
As a result, I am half-disappointed with not completing all of the edges of painting I had to do today. And I am also incredibly surprised by how much my hands and wrists hurt (now that I'm done for the night) from holding the blocks and brush...actually, my fingers and forearms and shoulders, too...waaaah. And my eyes are crossing from squinting to see the edges (I should have just put on the "cheaters".) BUT...it is a start and I will get them finished tomorrow!
I found they take an average of 3 minutes apiece. Add on the time it takes to wash the brush for each color change...and for stirring the paint.
I LOVE the Lumiere light body metallic acrylic paints. I LOVE how the colors blend themselves and shift when you turn the piece in your hand into and out of the light. The Lumiere Neopaques are not so great for this project. We had two colors of Neopaque (580 Yellow and 584 Blue) that we were using for some of the blocks. The blue is okay but the yellow doesn't cover the rough edges of the MDF. The paint is great, it just isn't right for this particular application. Plus, after seeing so many of the metallics, the flatter and plainer Neopaques just aren't working for me. I will accept the blue, but I need to choose a different color for the yellow. I will probably go with the 552 Bright Gold Metallic -- I was delightfully surprised by how not horrible that looked to me. I don't generally care for gold, but this gold paint is really great.
SO -- I completed 52 out of 100. I have to repaint the 3 yellow ones...that makes 51 for tomorrow. (No, I didn't do the math...I just counted the ones that are left...LOL)
Here are some photos:
7 down, 93 to go!
the Neopaque Yellow just doesn't work for this particular project...the edges of the MDF are too rough and too dark
Friday, June 24, 2011
365 Day 175
getting ready to paint the edges
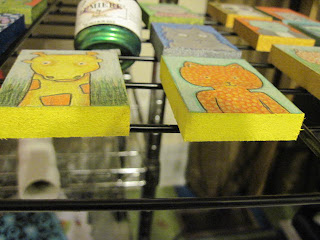
Juana Moore and I collaborate on an Art-o-mat series called "Penciled In". I draw the characters and Juana gives them color and personality. Then I paint the edges of the blocks and add a hand made twisted wire hanger to the back of the blocks.
This time we have made a set of 100 blocks (instead of the usual 50). I was going to set them all out and stack them into piles that would be painted the same color. Well...I really started getting anxious about wrecking Juana's incredible color combinations by choosing a non-complimentary color for the edge. Luckily, we had planned already that Juana would be coming out here to play M:tG tonight. So before we started playing Juana chose the colors and I stacked the blocks. Whew! Now I can just get down to painting them.
I like to use Lumiere paints for the edges.
the box of blocks
my failed attempt at sorting the blocks into color stacks this morning (note how many are still in the box)
I know it doesn't look like it, but we sorted out all 100 blocks...now I can just come in and paint them all
Labels:
Art-o-mat,
colored pencils,
Juana Moore,
Lumiere paints,
Penciled In
Thursday, June 23, 2011
365 Day 174
making a new "automatic" drawing in my relief printmaking class sketch book
This afternoon I went to choose a mat and frame for the relief print I made for the all ages student show at Art & Ideas. It will be ready to pick up on Sunday. I need to take it to class on Monday night to turn it in. I am very excited about this. I really really like the frame and the mat is a great color. I got UV protected glass for it, too. And they will put a wire on the back instead of the sawtooth hanger. I can't wait to see it!
This week we are supposed to make some more drawings in our sketch book. Tonight I thought I would document how the "automatic" drawing technique works for me.
Obviously, I start out with a blank page in the sketch book that Shaqe Kalaj gave us at the first class. We use thin Sharpies -- no erasing.
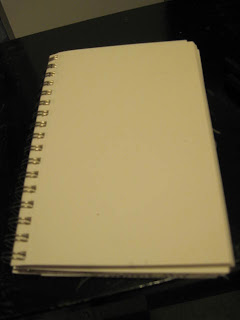
I tend to start at the upper left corner of the page and hold the pen really loosely with my thumb and index finger and let it sort of dangle and hit the paper as it wants to. I try not to do any conscious guiding of the pen. I seem to have the best luck when I go diagonally down the page from the upper left corner to the lower right.
The pen touches down on the paper, sometimes it bounces off, sometimes it just makes a dot...I try to let it do whatever it wants to do.
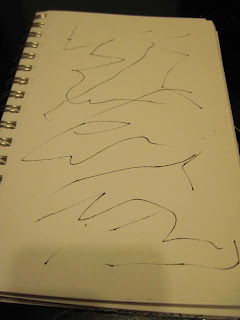
Pass number one.
Then I turn the sketch book once, clockwise.
Pass number two...working again from upper left corner and more across and down with the book in this direction, down to the lower right.
Give the book another clockwise turn.
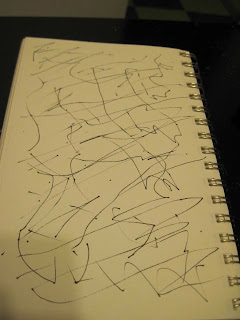
Pass number three. At this point the sketch book is upside down. Again, starting at the upper left corner and coming down diagonally to the lower right.
Turn the book one more time clockwise.
Pass number four. Repeat the sideways/diagonal marking of the page.
Now I slowly rotate the sketchbook all the way around, trying to find shapes or creatures.
I was having trouble seeing anything in there. Nothing.
Method #2 -- unfocus my eyes and rotate the book slowly.
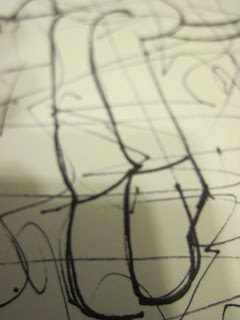
OH! A pair of legs -- bent knees down to the shoes.
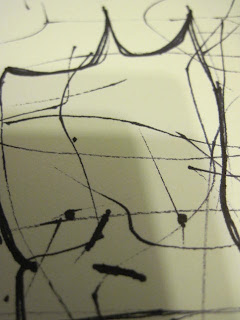
And LOOK -- there are two eyes and a mouth...and the shape of a face.
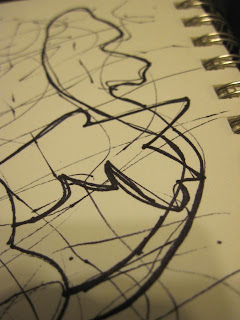
And a tail...and what's that -- a WING???
I am telling you, I would NEVER in a million years think of drawing this.
And there is a new creature -- some sort of winged super hero.
I would NEVER have been able to draw the legs and shoes...never get them even/symmetrical. I could never have drawn this guy coming down from the sky/flying. The way his tail is fluffed upwards, his downward glance, the way his wings are outstretched...just the right proportion to his body.
This "automatic" drawing technique just amazes me. And I have William Hessian to thank for showing me how he does it. I do it differently than he does, but I start with the same basic just-barely-holding-the-pen thing.
From here I will take this to class and work on it. The things Shaqe has been helping me with -- the letting go of my rigid ideas, filling in more and more with little details, letting things come in more intuitively...they are all making their way into the way I am seeing things and working with materials...and it is carrying over into other art I am working on, too.
I LOVE this class!!! I highly recommend it!
Wednesday, June 22, 2011
365 Day 173
racing the clock to my midnight posting deadline
I JUST finished a marathon printing session testing out papers and different hardnesses of rubber rollers for inking. This is the block I will be printing for my submission to the all ages student show at Art & Ideas.
FIRST I had to move Twink to the bedroom and close him in there so he wouldn't "help" me.
(wow -- I apologize for how yellow the lighting is in these photos...kinda hard to look at)
Yeah, this photo pretty much shows you the kind of wacky mood he was in.
Juana and I went to Utrecht in Royal Oak on Tuesday and I selected several lovely handmade papers and -- with Anita's guidance -- a few more plain papers probably better suited to printing.
I got all of my supplies ready to go -- clean printing!
And I made a note of all of the names and colors of the papers in case I really liked one or two and wanted to get more of it.
I know some of the papers aren't really meant for this but I wanted to see how they would look.
This was the first plain paper. I just did the first pass of inking and rubbing the back of the paper. I like how you can see the image through the paper as you work it.
I am lifting up the bottom half to check to see where I need to re-ink and rub more.
Now the top half.
Not too bad for a first try.
Most of these papers are Unryu in different colors. It is pretty thin and has fibers in it...I love this paper and use it in collage a lot, but I don't really think this particular block is a good match for any of these.
You can see in this photo how saturated the paper gets with the ink -- it is very thin and lightweight.
This was actually the last plain paper...a slightly heavier weight...well, heavier than Unryu or Mulberry. Canson Rives Lt Wgt White. This was the best print...the ink is wet and there is glare from the overhead lighting.
I wanted to try this paper to see if you'd be able to see the floral pattern through the ink. The paper itself is slightly not totally flat -- I don't have the correct words/terms to describe it -- but it doesn't smooth out totally, so it is kind of hard to get the block to print flat and smooth. I want to re-visit this when it is dry.
This is "green mist" Unryu paper. Too thin and fiber-y. I was rubbing off too much paper...rubbing down through to the block with hardly any pressure.
Same paper in mauve.
This paper is really pretty. Lokita gold brush on tiger yellow. There is a gold ink or something running over the top of it. I am not sure the ink will look right when it is dry.
Again, the ink is wet in this photo and there is glare from the overhead lighting, but you can also see the gold in Asian-like pattern in the paper.
All of the prints drying.
I am very excited to participate in the all ages student show at Art & Ideas. As a kid I was never in a dance class, never played an instrument or was never in a play or anything where family and friends would come to watch. Now that I am 57 (going on about 14) this is really cool to me. My sister Sue said she would come. Yay.
(NOTE: I see that Blogger lists this entry at 11:31 pm...that is actually when I started adding photos and writing it. I clicked "publish" at like 11:58...LOL)
Labels:
Art and Ideas Gallery,
papers,
printmaking,
test prints
Subscribe to:
Posts (Atom)